|
|
How to Make Wine Vinegar:
The "One-Shot" Crock or Jug Method
 When learning how to make wine vinegar, this is the most straightforward and easy method, requiring the least set-up and investment. In fact, in truth nothing is needed to make vinegar from wine. If exposed to air wine will start to ferment into vinegar on its own. The bacteria which cause the conversion from alcohol to acetic acid are ubiquitous. But to help it along and to make vinegar in a more controlled way, we will cover the basics of how to set up your first batch. The vinegar you can make in this way is as good if not better than anything you can buy in a market. If you'd like to tray a bit more advanced technique how to make wine vinegar which will allow you to keep an ongoing, continuous fermentation going at all times, see our Make Vinegar in a Barrel page. When learning how to make wine vinegar, this is the most straightforward and easy method, requiring the least set-up and investment. In fact, in truth nothing is needed to make vinegar from wine. If exposed to air wine will start to ferment into vinegar on its own. The bacteria which cause the conversion from alcohol to acetic acid are ubiquitous. But to help it along and to make vinegar in a more controlled way, we will cover the basics of how to set up your first batch. The vinegar you can make in this way is as good if not better than anything you can buy in a market. If you'd like to tray a bit more advanced technique how to make wine vinegar which will allow you to keep an ongoing, continuous fermentation going at all times, see our Make Vinegar in a Barrel page.
What you will need:- A large crock or glass jug fermentation vessel: The size is up to you but it is important that it is made or glazed with a completely inert, non-reactive material. Glass or enameled earthenware are best. I recommend finding a large gallon or larger jug or carboy when first learning how to make wine vinegar.
- Cheesecloth
- Kitchen twine or rubber bands
- Left-over wine: While you can buy wine specifically to make vinegar, you don't have to. Instead, when having wine tastings or dinner parties collect the left-over wine. Put it in bottles, filled up to the top and then corked, until you save up enough to fill your fermentation vessel at least half-way. You can even use wine left over in glasses or a dump bucket, just filter it lightly through cheesecloth. If you are worried about contamination you can always heat up the wine somewhat, but boiling will boil off the alcohol which is what is converted into acetic acid. The better the wine you use when learning how to make wine vinegar, the better the vinegar you will make. You don't need to use very expensive wine but try to avoid using very cheap wine. Some people ask if you can use flawed wine, such as wine which is corked (containing TCA contamination). I would avoid using anything that you wouldn't drink. It is likely to add strange flavors or aromas to your vinegar as well. You can use red and/or white wines. If you want a completely white vinegar then you should only use white wines. Do not use sweet wines as the residual sugar can introduce other contaminants.
- Vinegar Starter ("Mother of Vinegar"): When first learning how to make wine vinegar you can buy mothers in most home brewing and wine making supply shops. Alternatively, you can take a piece of one from a friend who makes vinegar. If you have an old bottle of vinegar which is half full and has a slimy looking mass in it, you can use that as well. Basically you want anything that will inoculate your wine with the vinegar making bacteria. If all else fails, you can make vinegar without a mother starter, the bacteria will inoculate the wine on its own from the air. However, this is less consistent and may take a long time. To get a good clean start, find a starter mother.
- Plastic or stainless steel food-safe funnel for bottling
How to Make Wine Vinegar:- Your ultimate goal in learning how to make wine vinegar is to get the vinegar bacteria to convert the alcohol in the wine into acetic acid, the acid in vinegar which gives it its tart taste. The bacteria need oxygen to perform this fermentation reaction, so you want an open container that allows air to your wine. On the other hand, you don't want it totally open to the air because the wine will attract fruit flies and other bugs. So our first step is to set up the fermentation vessel that allows oxygen to get in but not bugs.
- You want the wine in your jug or crock to form as large an air-contact surface as possible. Therefore you don't want so much wine that it fills up into the narrow neck of a glass jug. Instead use a larger jug or use less wine. Once you have collected (or bought) enough wine to fill the vessel to that level, clean the vessel thoroughly with hot soapy water and rinse with hot water. You want to get rid of any other bacteria and any thing else that may have been in the jug. After rinsing well, drain thoroughly.
- Next, pour your mother of vinegar and/or a good portion of good wine vinegar into the jug or crock. Swirl it around to coat all the surfaces. This will help to kill any other bacteria and will fully inoculate the fermentation vessel with just those bacteria which live in vinegar.
- Now pour your wine into the container. As mentioned above, when learning how to make wine vinegar be sure the wine has as much air surface-area as possible. You want the bacteria to be able to ferment the wine as soon as possible. Don't fill it up into the narrow neck of the bottle or you won't have a big surface area. For a standard jug or carboy the sides are parallel so half-full or slightly more is fine.
- Now cut a piece of cheesecloth that completely covers the top of the container. You want a couple layers of cloth so that small fruit flies and other small bugs cannot get in. However, you want it porous enough for air to easily get through.
- Cover the container and secure the cheesecloth in place with kitchen twine or rubber bands so that nothing can get around the cloth.
- Now set the fermenter in a place it can sit undisturbed. You want it to be at about room temperature (about 70 - 85° F). Cooler temperatures will slow the reaction down and the wine will not be converted to vinegar quickly. When learning how to make wine vinegar, check in on the fermenter occasionally. If your vessel is clear glass then you can see the activity. A layer of bacteria floating on the surface of the wine will slowly form, leading eventually to a thick, leathery and shiny "mother". This is normal and actually desired when learning how to make wine vinegar. It is that mother that is taking in oxygen and converting the wine alcohol into vinegar acid. If the mother is disturbed and sinks to the bottom it becomes inactive. A new one will form slowly but you ideally want to protect it and keep it floating on the wine. So do not disturb the container or add any wine once you have set it up.
- After about 3 months (depending on the size of your container and the amount of wine) your vinegar will be about ready. With this type of set-up you cannot be 100% sure it is ready until you open it and drain out your vinegar. One thing to look for when learning how to make wine vinegar is to be sure you developed a nice thick mother on the surface of the wine. Also, put your nose right up to the cheesecloth and take a deep whiff of it. It should be intensely vinegary, almost burning your nostrils. When it is ready it is quite an intensely acidic and burning smell, not a sweet, fruity smell like it started out with as wine. It is easier to follow the evolution of your vinegar if you use the Continuous Barrel Fermentation Method which allows you to sample your vinegar periodically. If all else fails, follow the following steps and pour out your vinegar. Smell and taste a bit in a glass. If it is not acidic enough for your taste, you can always pour it back into the fermenter, along with the mother to re-inoculate it, cover it and let it ferment another month or two. The longer it goes, the more acidic and strong it will become until all the alcohol is consumed.
- When the vinegar is ready, simply swirl the container or push the mother down before pouring off your vinegar into a large non-reactive container. You can filter and save the mother to re-use on a new batch or throw it away if you don't plan to make another batch right away. Don't use an aluminum filter or strainer as this will react with the vinegar acid.
- You can use the vinegar at this point but I prefer to go a couple steps further to improve the flavor and intensity of the vinegar. First of all, at this point, unless you let it ferment a very long time, there is still some alcohol in the vinegar. Boiling will get rid of this alcohol quickly. Boiling the vinegar also serves to ensure that it is sterile. Finally, boiling the vinegar down will reduce its volume, getting rid of water, so that its aromas and flavors are concentrated. This will result in a superior vinegar with strong, bold flavors. This is one step in learning how to make wine vinegar that we feel makes the difference between good vinegar and great vinegar. We like to boil the vinegar down for an extended period of time to about 3/4 to 1/2 the original volume. If you boil down the vinegar in this way it will be stronger flavored and you will use less each time. Boiling will not increase the acidity of the resulting vinegar.
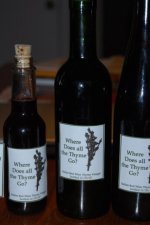
- If you boiled your vinegar, cover it and let it cool to close to room temperature. If you wish to make a herb flavored vinegar, this is the point to add herbs and spices. See our How to Make Herb Vinegar page for instructions and tips. It is now ready to bottle!
- Clean some empty glass bottles well with hot water. Using a food-safe funnel and several layers of cheesecloth or a coffee filter to strain the cooled vinegar into your bottles. Some people like to add a capful of hard liquor such as vodka or kirsch to each bottle to help stabilize it but this is not totally necessary. Cap the bottles securely with a cork or other tight-fitting closure.
- Your wine vinegar is ready to use but will actually improve in bottle for some time, even years, gaining in complexity and mellowing out into a smoother texture. As it ages in bottle it may throw some sediment which will coat the inside of the bottle. This is normal. If the sediment bothers you simply filter it before use.
For instructions on how to make wine vinegar in a continuous fermenting barrel which you can keep up over several cycles and can test periodically, see our Make Vinegar in a Barrel page. Also, if you want to make flavored vinegars like herb vinegar, see our How to Make Herb Vinegar page for instructions and tips.
Done learning about How to Make Wine Vinegar in a Crock or Jug?
Return to the How to Make Vinegar homepage.
|
|
|